There have been a few games using the Vendean figures pictured below, unfortunately none of which were photographed. However one in particular does spring to mind.
The scenario was that one 30 fig British battalion (Old Glory AWI figures, as close as you can get at the present to represent the Brits for this period) was en-costed in a small village near one end of a length ways 8' by 6' table where two roads converged which then split and ran to the Republican end. The British were in possession of a ramshackle cart containing various goodies which the Republicans simply had to posses. The British (in this instance Rob) would roll one D3 die on the arrival of the French at the far end of the battlefield and that's how long they had to rouse themselves from their slumber, hitch the cart and bugger off!
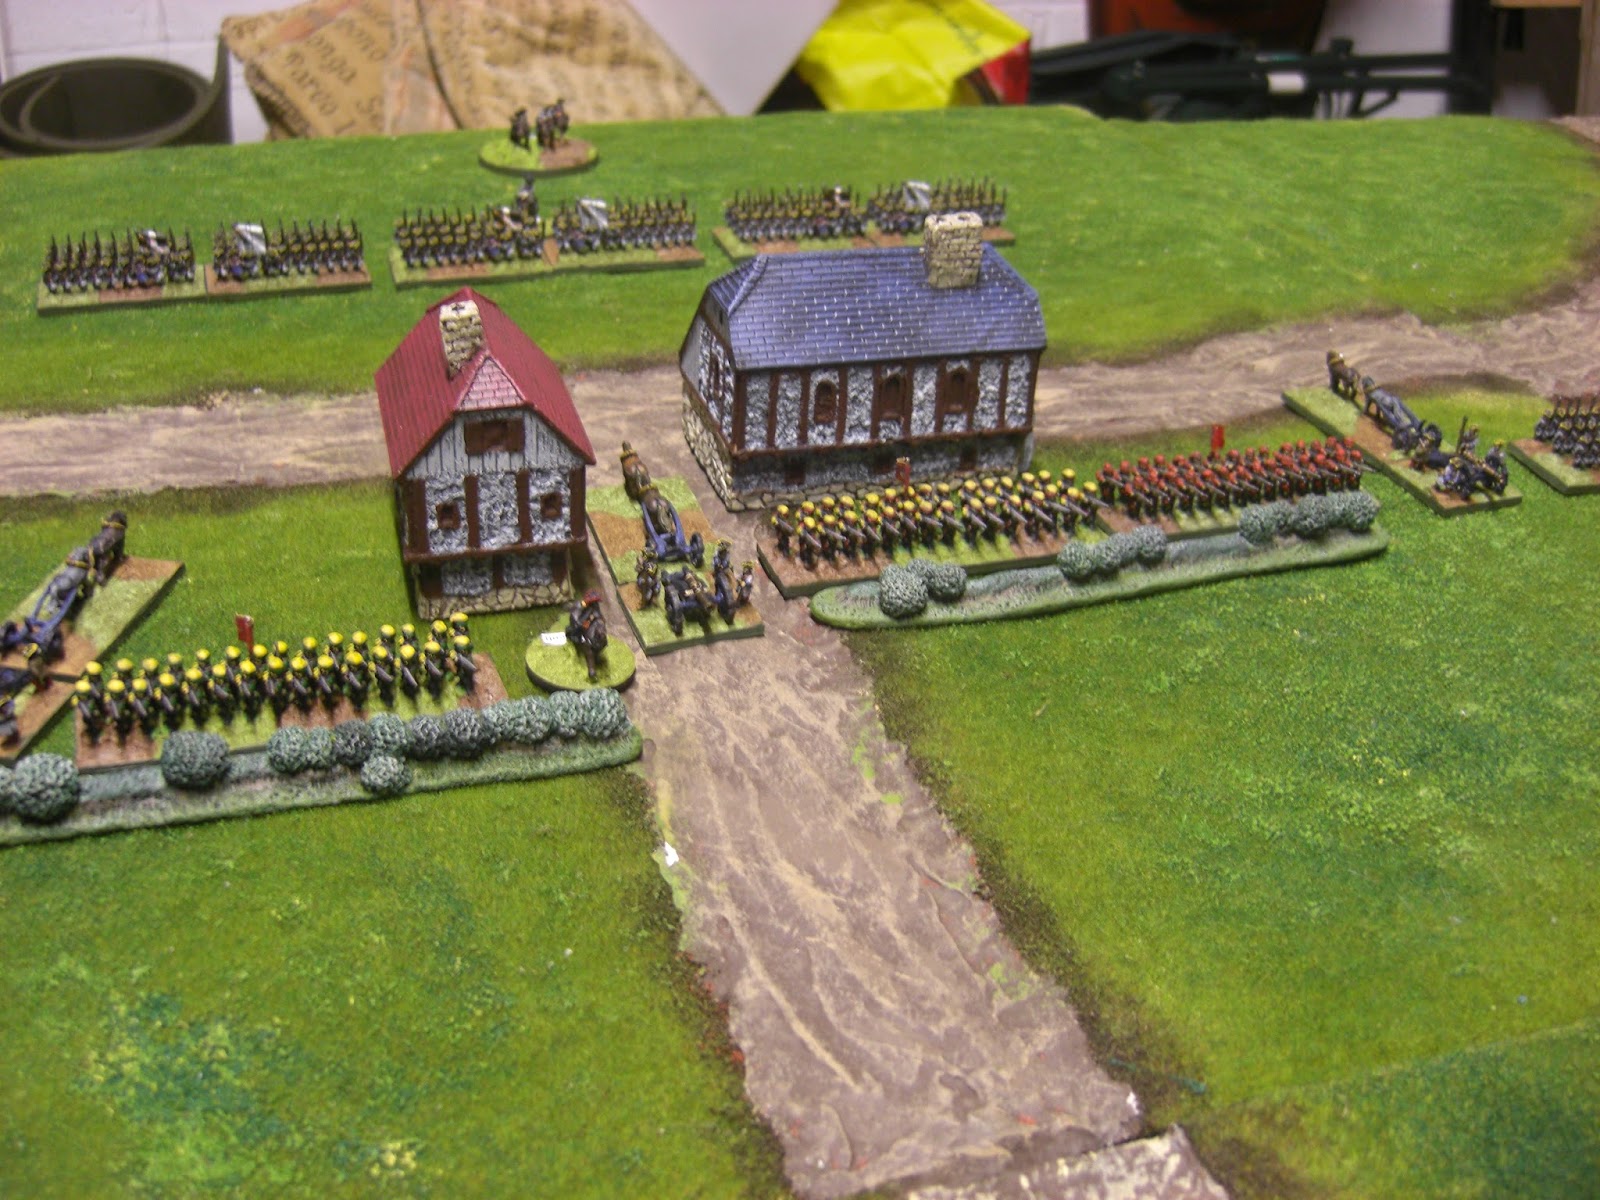
The French duly arrived in two separate columns, one on either road (Tom commanding three 34 fig battalions and John having two plus an artillery piece. overwhelming odds you would think, Ha Ha. I was umpiring) and marched down the two converging roads towards the British battalion struggling to form up.
Rob decided that his British battalion would have to form line to face the left hand force of two Republican battalions and gun while the cart struggled at crawling pace towards the table edge, as the infantry was of good quality and the French were crap he felt that he may have a chance on this part of the field.
This of course left Tom with a free run with his troops down the road past a large wood on his right and round the back of the village to the lumbering cart.
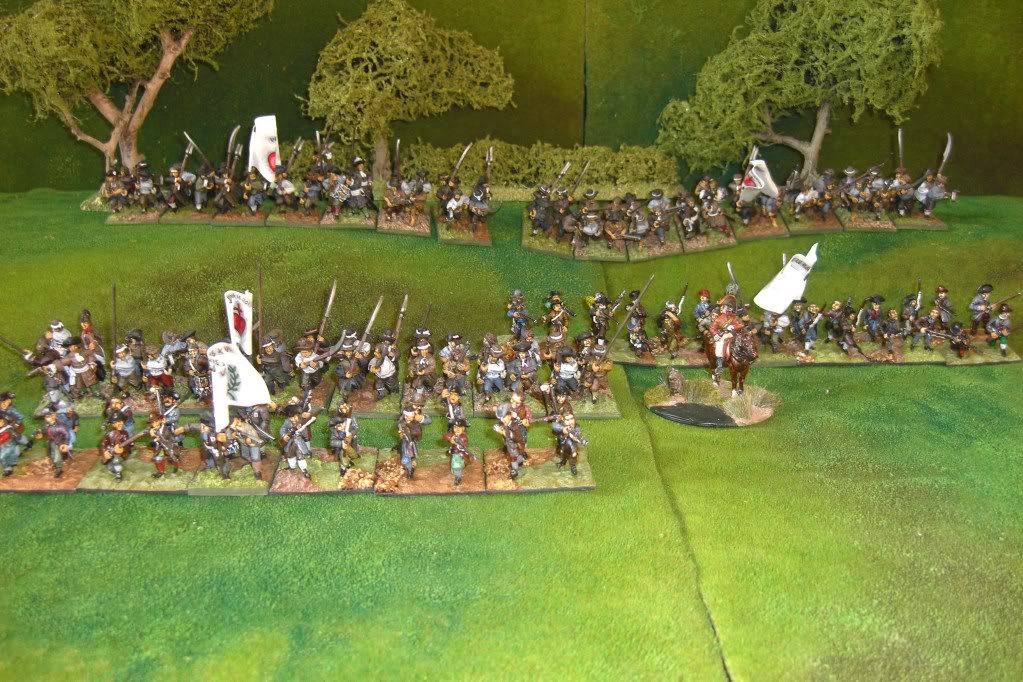
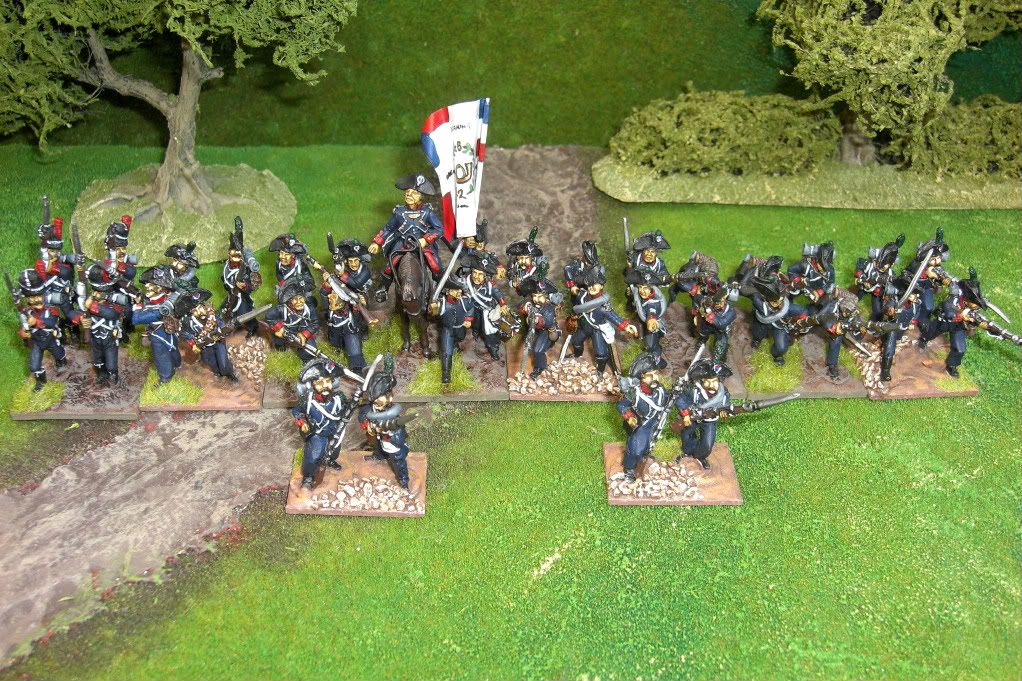
With a look of glee on his face he left John to engage the veteran British battalion on his own and went for the prize. His look of horror when (in column) his troops drew level with the wood and the five units of Vendee Royalists seen below were placed 4'' from his right flank with a 3pdr gun pointing straight down the road to his front. Canister was duly fired from the gun and on the 'test to receive charge' phase (General de Brigade rules) his whole brigade turned on their heals and ran pell mell back up the road never to be seen again. I did give them a considerable minus on their die roll for first seeing the enemy.
Rob (who of course knew fine well that the Royalists were in the wood) proceeded to see off the remaining Republicans with ease, sat back and puffed on his imaginary pipe and smirked.
A cracking game, even Tom saw the funny side (eventually) and a good time was had by all.
As I say I wish I had taken some shots of the game but I will be sure to do so on the next occasion the troops are out for a game.
Dave.
Monday, 31 October 2011
Sunday, 30 October 2011
Vive Le Roi.
A slight diversion off the beaten track but an aspect of the French Revolutionary period that appeals.
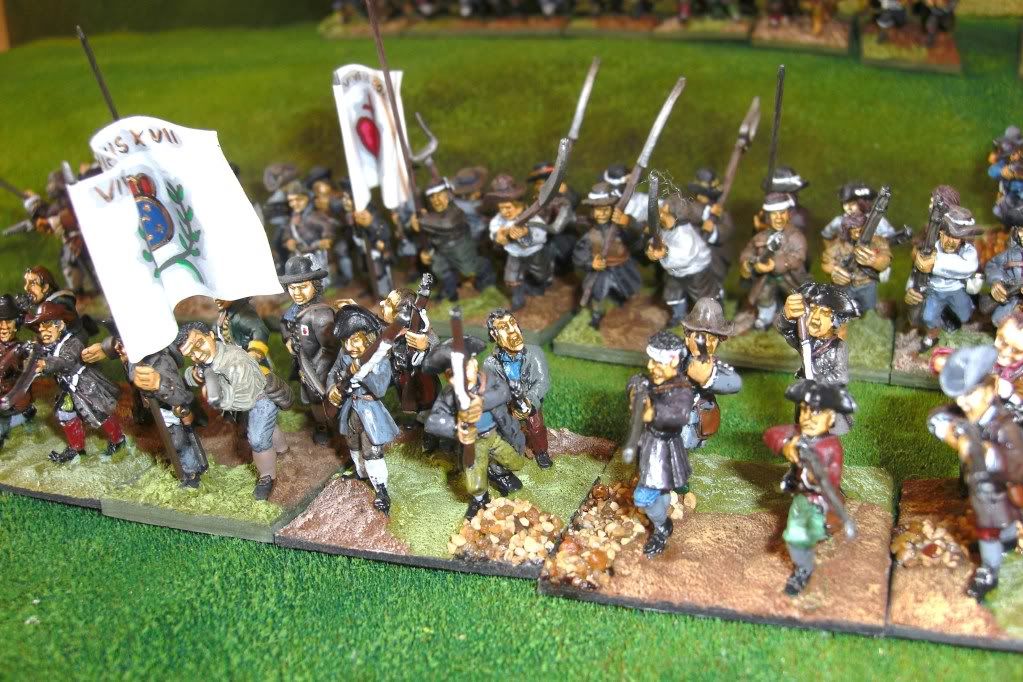
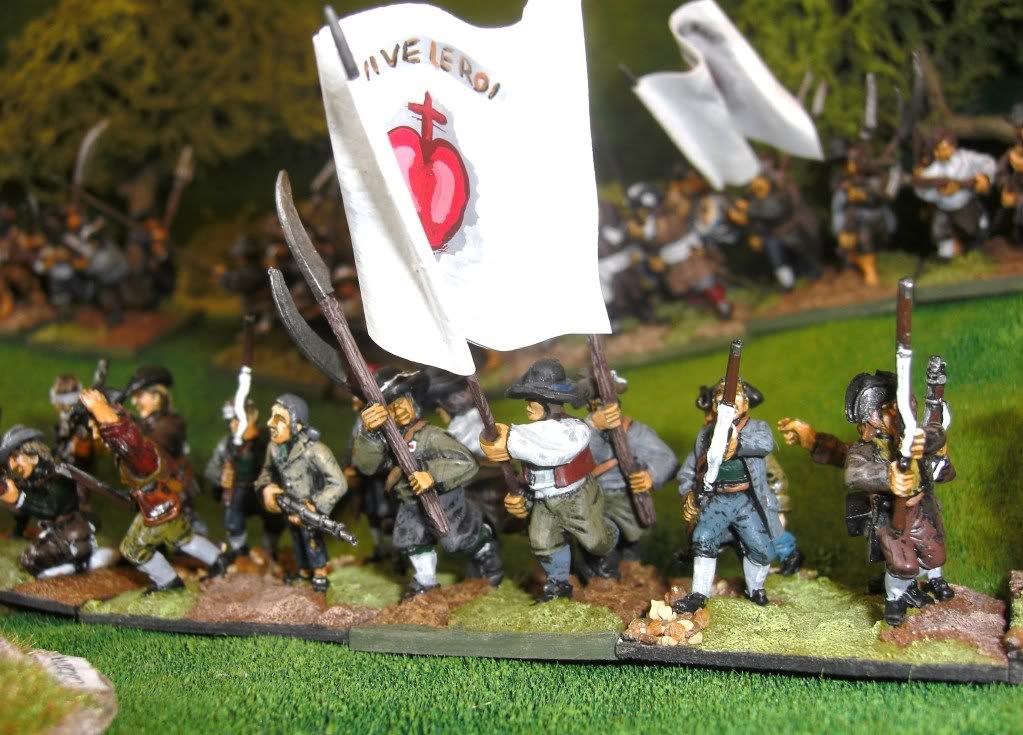
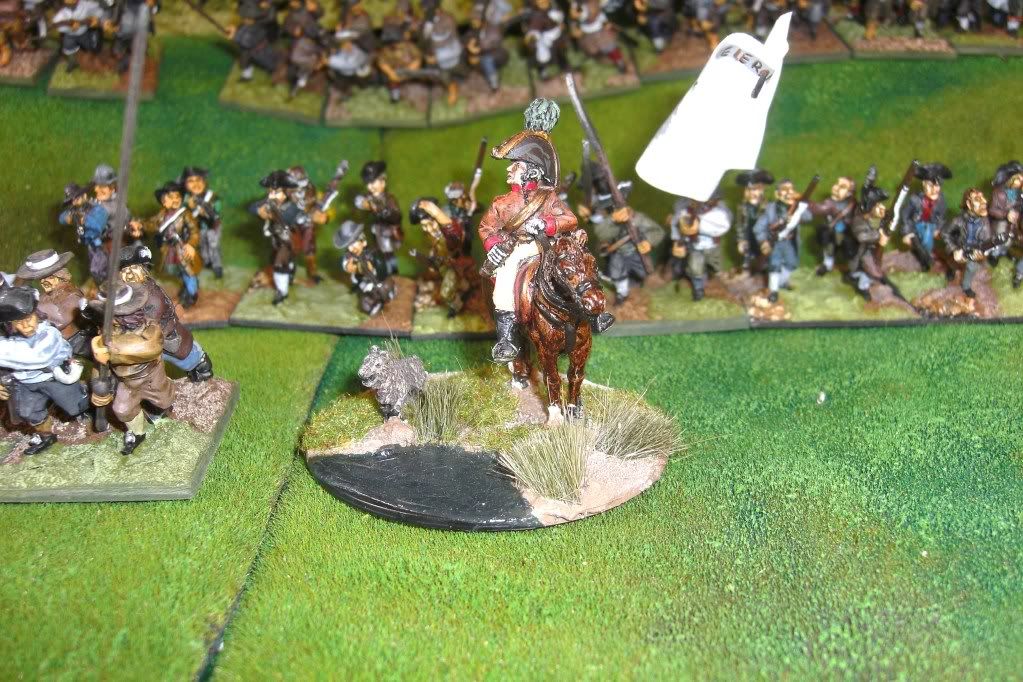
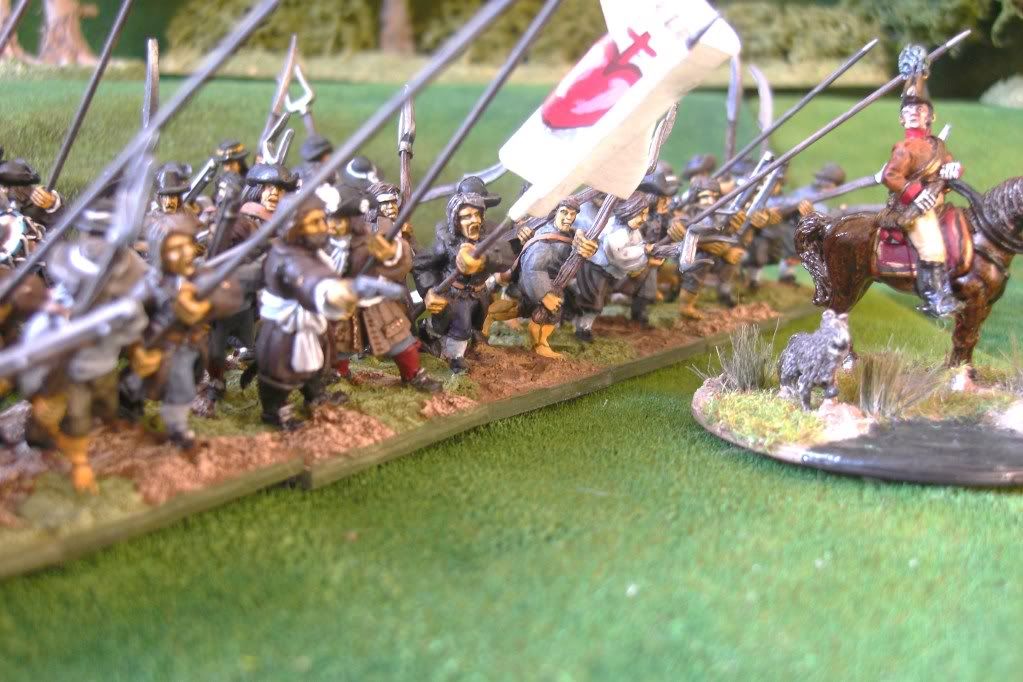
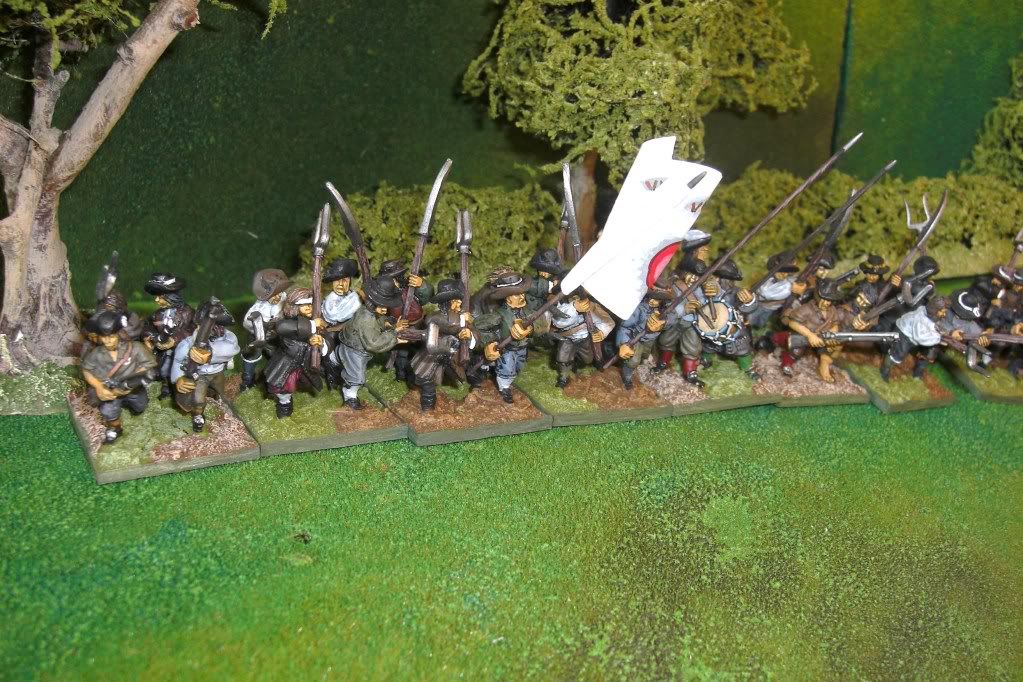
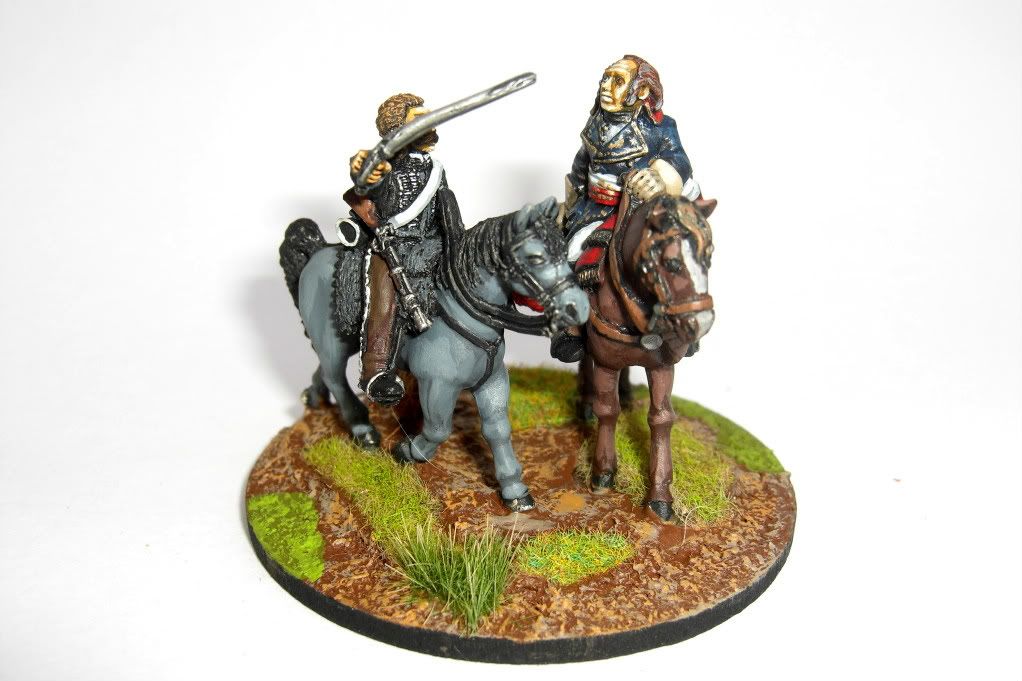
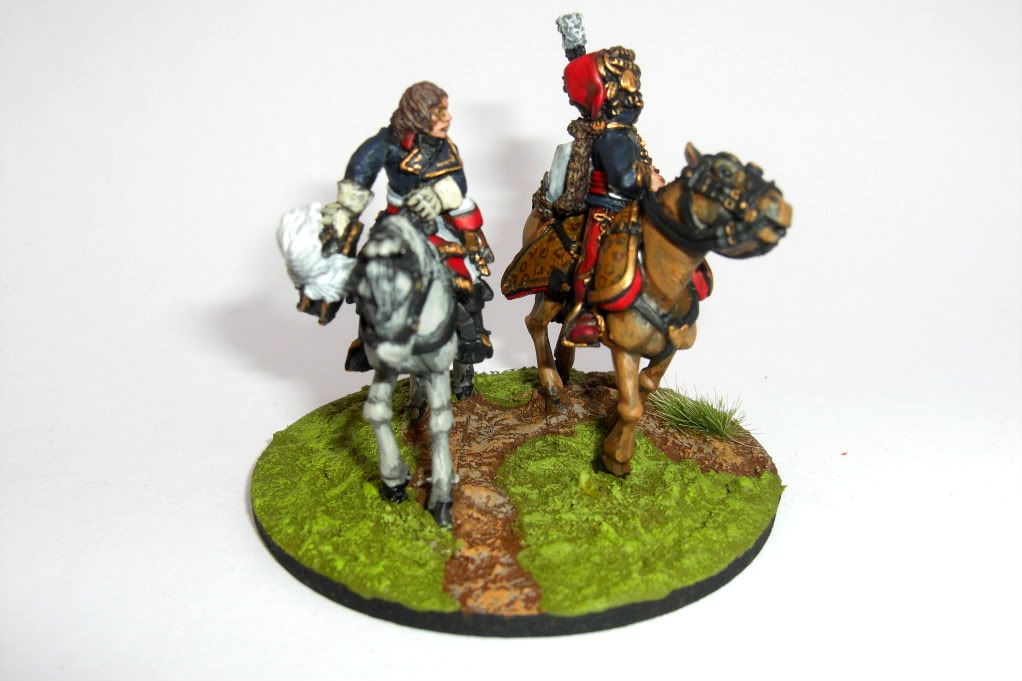
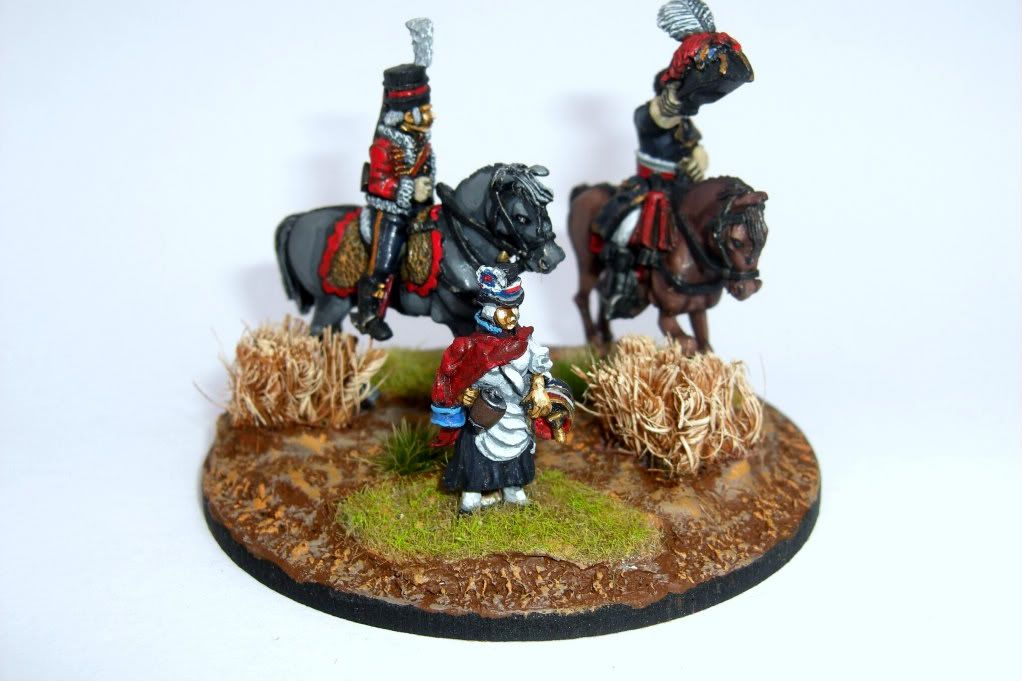
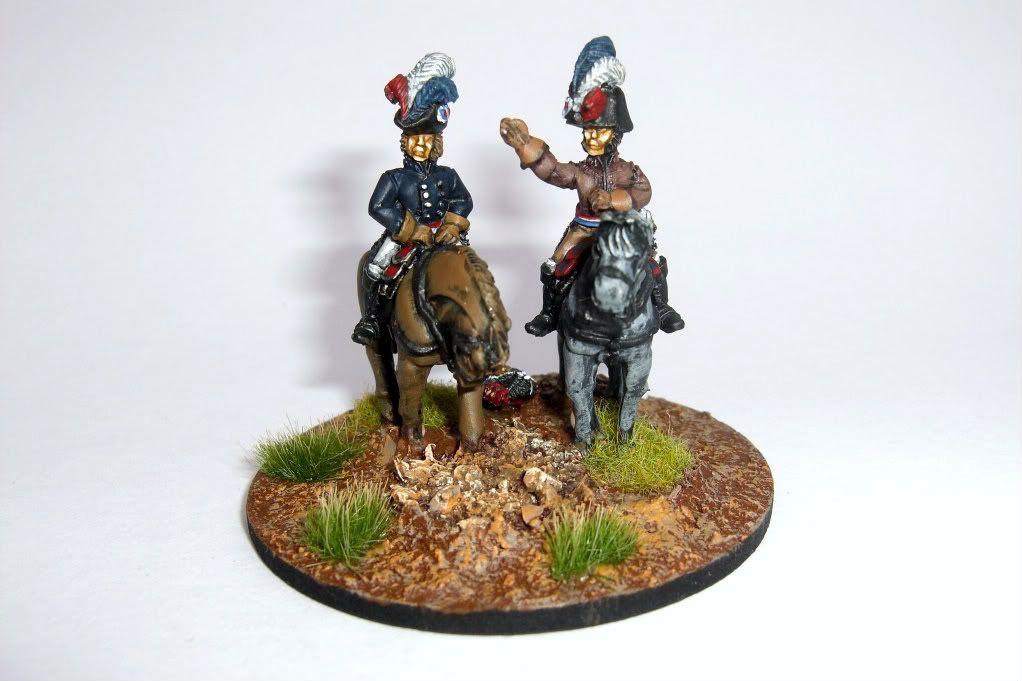
Here are some pictures of my Vendee Royalists, actually Reiver Casting's Monmouth's Army figures with Old Glory AWI Militia thrown in for good measure. Now I know that non of these guys are wearing the oft seen clogs that the royalists wore, but use what you have is what I say. The Reiver Casting stuff is sometimes much maligned, these fellows aren't the best I've ever seen, but nor are they the worst and remember these particular one's are the first range they ever produced. The ranges which have come out in recent years, particularly their Marburian and Very British Civil War stuff are spot on and they mostly finish a range, more than can be said for some manufacturers. By the way the command figure on horseback was not painted by me (not that there's anything wrong with the chap but I wouldn't want anyone coming on and saying that I didn't paint him and that they did!).
Other than the above, there's not much else to say other than here's the photo's:


 Note that on some of the pictures you can just see the Royalist recognition sign of the red heart on a white background on some of the figures.
A bit more information here, Wikipedia, and info on the Royalist army Wikippedia again,
Dave.
Here are some pictures of my Vendee Royalists, actually Reiver Casting's Monmouth's Army figures with Old Glory AWI Militia thrown in for good measure. Now I know that non of these guys are wearing the oft seen clogs that the royalists wore, but use what you have is what I say. The Reiver Casting stuff is sometimes much maligned, these fellows aren't the best I've ever seen, but nor are they the worst and remember these particular one's are the first range they ever produced. The ranges which have come out in recent years, particularly their Marburian and Very British Civil War stuff are spot on and they mostly finish a range, more than can be said for some manufacturers. By the way the command figure on horseback was not painted by me (not that there's anything wrong with the chap but I wouldn't want anyone coming on and saying that I didn't paint him and that they did!).
Other than the above, there's not much else to say other than here's the photo's:

A bit more information here, Wikipedia, and info on the Royalist army Wikippedia again,
Dave.
Friday, 28 October 2011
French Revolutionary books
Just thought I'd put up a quick list of some of the books I use relating to the French revolutionary Wars figures. Probably nothing in there that's new to most people but a starter for someone who's just getting into the period.
Firstly the Ospray stuff:
Men at Arms series, 257 Napoleon's Campaigns in Italy, P Haythornthwaite.
Men at Arms series, 328 Emigre & Foreign Troops in British Service (1) 1793-1802, R. Chartrand.
Men at Arms series, 403 French Revolutionary Infantry 1789-1802, T. Crowdy.
Warrior series, 63 French Revolutionary Infantryman 1791-1802, T. Crowdy.
Essential Histories, The French Revolutionary Wars, G. Fremont-Barnes.
Campaign series, Toulon 1793, R. Forczyk.
The Battle of Marengo 1800, D. Hollins.
As for other books:
Uniforms of the French Revolutionary Wars, 1789-1802, P. Haythonthwaite. Blanford.
(The first book I bought and the one that got me started in this fascinating period).
The Art of War of Revolutionary France, 1789-1802, P. Griffith. Greenhill Books.
(Some find this a bit dry but frankly I think it's great, covering strategic, tactical and political issues).
Napoleon's Army, Col. H. C. B. Rogers. Purnell Book Services.
(Though this book also covers the Napoleonic period it gives an in depth look into the organisation of the French armies for the Revolutionary period as well. It also has some great black and white plates inside.)
French Infantry Flags (from 1786 to the end of the First Empire), L. Letrun. Historie & Collections Series.
(All the information on this subject you could wish for).
Finally:
Eagles over the Alps (Suvorov in Italy and Switzerland 1799), C. Duffy. The Emperor's Press.
(A great read, you must get this if you want to use those Eureka Russians they have brought out).
A few links:
Revolutionary Flags, especially French cavalry
NYPL Digital Gallery uniform plates for various nations, worth digging through.
Same as above but for the French only
Russian uniform details (and I mean detailed!) for Suvarov in Italy.
Cavalry, artillery for the above.
Guards and other stuff for the above.
Not the same source but plates for the above campaign.
Piedemontese uniforms for the Italian campaign (in Italian but with plates).
Seven Years War Prussian figures would do perfectly well for the above.
More Sardinian stuff, needs translating.
The Dutch army during this period.
Finally Wikipedia is always a good resource.
Like everything always cross reference all the above if possible, non of course is original material and people get things wrong!
That will do for now, it's surprising how long it takes to put this stuff on here. I hope it will encourage a few people to look into this period.
Dave.
Saturday, 22 October 2011
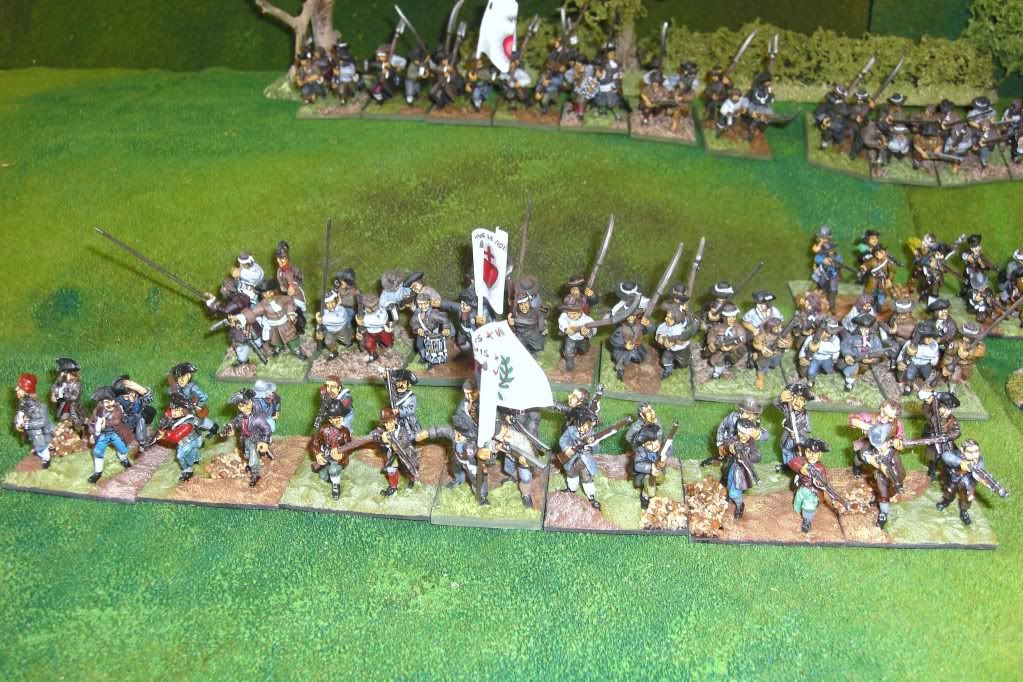
French & Austrians
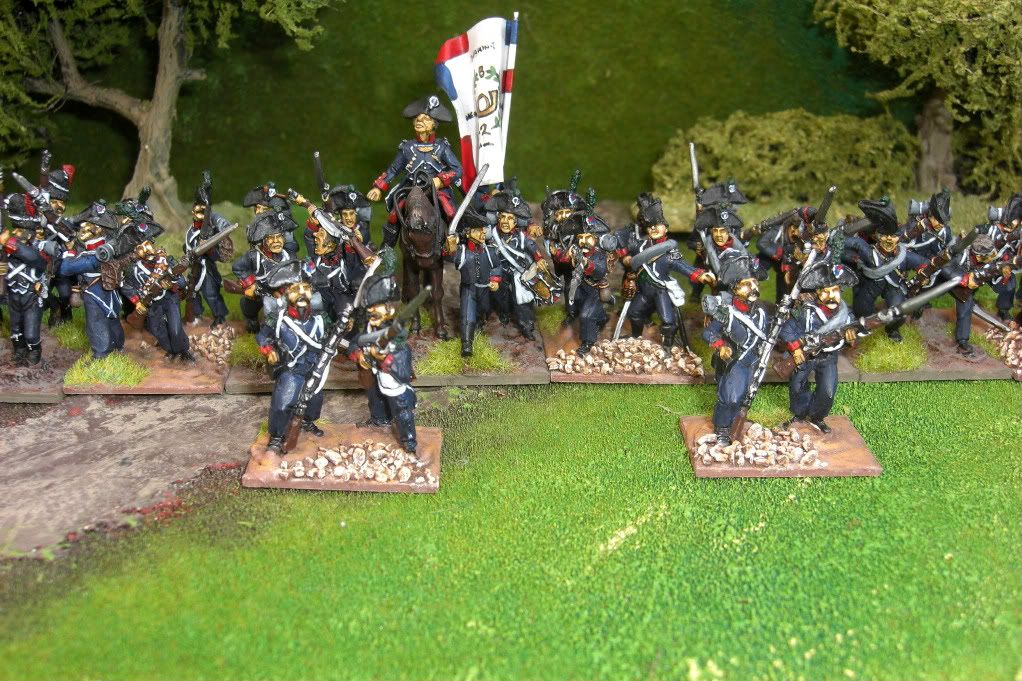
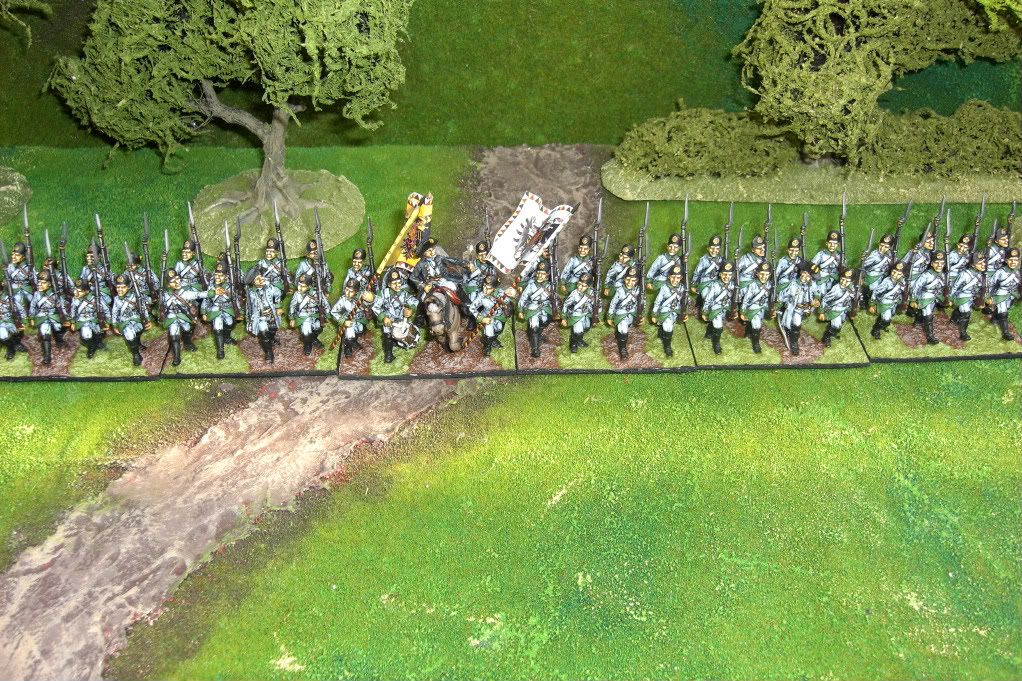
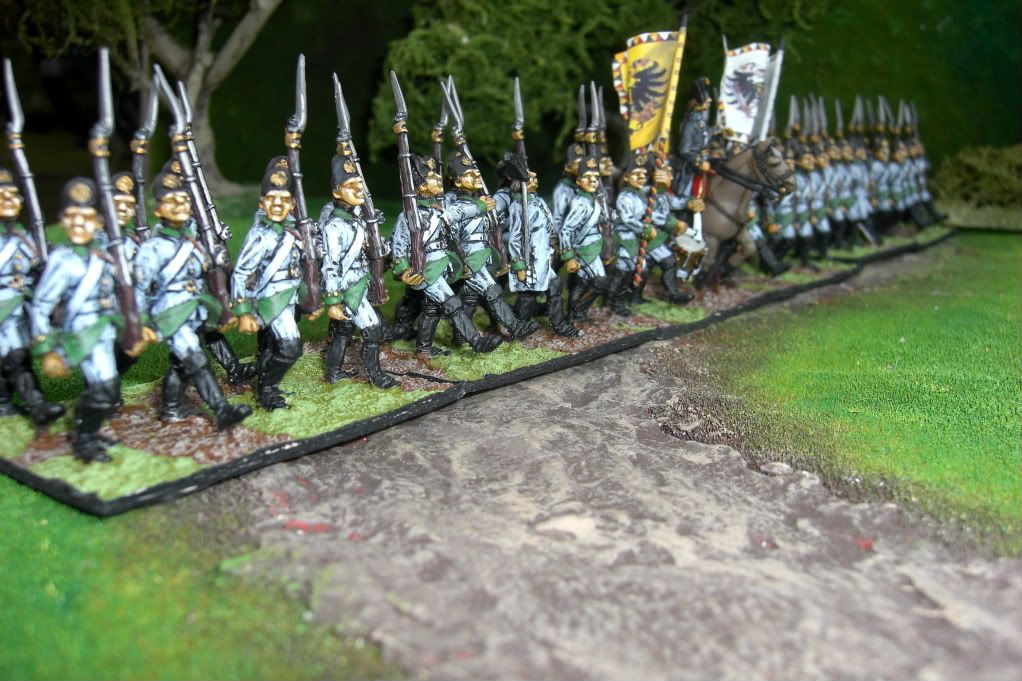
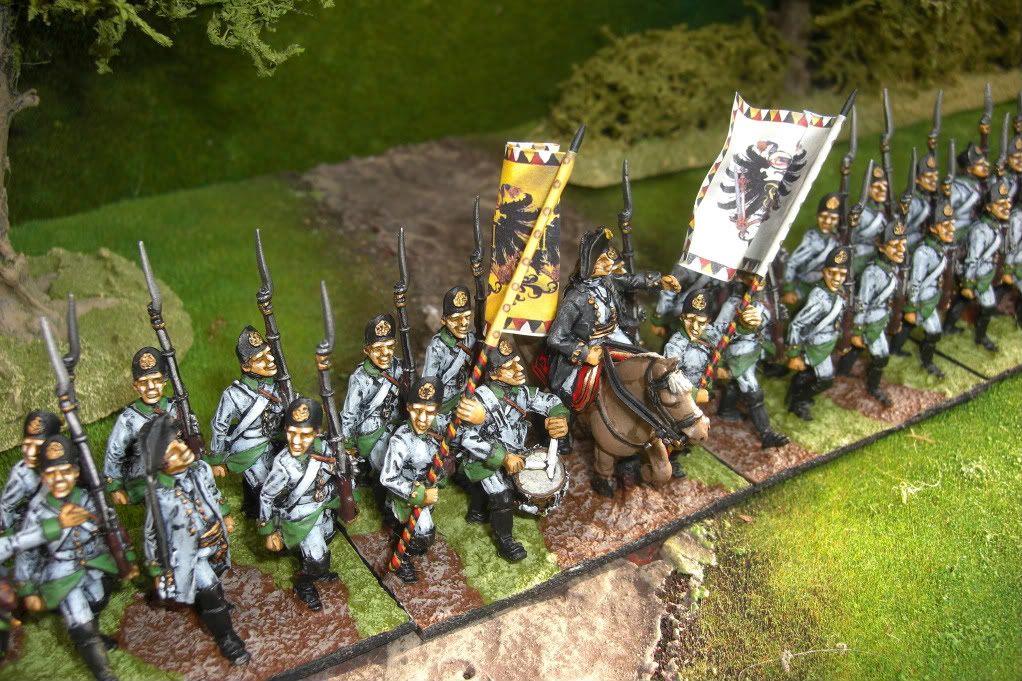
Some more Revolutionary pictures, this time more French and some Austrian infantry. I've added some small vignettes of the command figures for a bit of variety. These figures were done about two years ago and truthfully the faces aren't up to much but the idea was always to raise a couple of armies fairly quickly so the painting wasn't ever going to be of the highest standards. Never mind there bloody good fun to game with.
Firstly the French, this is the first of two Battalions of the 2nd Chasseurs a pied. You will notice that they are wearing trousers or gaiters and not the short light infantry boot, I had the spare figures and given the turmoil of the times I figured that, well, anything goes!
1st Battalion 2nd Chasseurs a pied Old Glory figures:

 The Austrian 1st Battalion IR 9. Elite figures:


 Three French command stands:


 Representatives du Mission:
 I still need Austrian cavalry of some sort, Eureka's stuff is as I have said in the past, great but too pricey for me!
That will do tonight, see what next week brings.
Firstly the French, this is the first of two Battalions of the 2nd Chasseurs a pied. You will notice that they are wearing trousers or gaiters and not the short light infantry boot, I had the spare figures and given the turmoil of the times I figured that, well, anything goes!
1st Battalion 2nd Chasseurs a pied Old Glory figures:

That will do tonight, see what next week brings.
Saturday, 15 October 2011
28mm French Revolutionary
I think it's time to put something slightly different on this week. I've been interested in the French Revolutionary Wars for at least ten years and started this collection several years ago. The French are mainly Old Glory with bicorn chapeau, lovely figures, very animated and perfect for my idea of how revolutionary troops should appear. Look closely and you can see that the coat tails are slightly too long as they are really for 1805-07 but at the time I began the collection no-one else made figures for this period. The Austrians are Elite (again very nice figures though ugly little buggers) and Trent miniatures. I love the Eureka range, great design and a full and expanding range, just sooooo expensive.
For rules I use the General De Brigade set with slight changes to reflect the more limited manoeuvrability of the Austrians and the enthusiastic but brittle French.
The Figures and flags are for the army of the North in 1794-5.
Austrian Grenz Elite figures.

Two Austrian line battalions Trent figures with attendant guns.


French infantry battalions.


French Dragoons Front Rank figures.


French Chasseurs with early helmet, Elite figures.

With Old Glory Hussars behind from their 'French in Egypt range'.


A French horse artillery battery, again from Old Glory's 'French in Egypt range'.


More figures to come next week.
Dave.
For rules I use the General De Brigade set with slight changes to reflect the more limited manoeuvrability of the Austrians and the enthusiastic but brittle French.
The Figures and flags are for the army of the North in 1794-5.
Austrian Grenz Elite figures.


Dave.
Saturday, 8 October 2011
The battle of Austand 1704.
The following is an account of a 10mm WSS game between Neal and myself in my garage at home using '& Blenheim Palace' Black Powder amendments from Last Hussar
The following is an account of a 10mm WSS game between Neal and myself in my garage at home using '& Blenheim Palace' Black Powder amendments from Last Hussar
The main change to the Black Powder rules in this supplement is that the Firing phase now comes before the command i.e. movement phase. This means that in effect a unit cannot now move up to an enemy and fire in the same turn but must now suffer the enemy unit to fire before being able to close in it's own initiative phase. We found that this seemed to reflect and encourage the use of the correct tactics for this particular period where units rarely engaged in melee other than fighting for built up areas, redoubts etc. We may in the future extend this to say that only shaken units may be charged from the front, we shall see.
All infantry get 'First Fire' +1 on the first time they fire, plus the British and Dutch get 'Platoon Fire', another +1 on their first turn of firing making them +2 in total. French cavalry us the 'Caracole' rule meaning that they cannot counter charge but instead fire at charging enemy cavalry using one die. The British cavalry have 'Ferocious Charge', re-rolling missed die rolls in their charge phase.
So here goes with the account of the battle:
The battle of Austand 1704.
June 1704, an Allied advance
guard consisting of fifteen battalions of foot with artillery support and ten
squadrons of horse commanded by Lieutenant General Cutts approached the village
of Austand in Bavaria.
It was 10 o’clock in the
morning when Cutts observed a French force occupying the village itself, and
the ground either side. After counting the standards of each enemy unit it was
found to consist of nine infantry battalions, four dismounted dragoon regiments
with attendant artillery and eight squadrons of cavalry.
Cutts immediately deployed
his infantry in two extended lines with a combined grenadier battalion in the
centre to assault and clear Austand and its surroundings to the front. The ten
squadrons of horse were placed on the Allied right flank opposite the French
Gendarmes deployed there.
The battlefield with the Allies on the right of the picture and the French on the left with Austand village in the centre of their line.


The other end of the field with the French on the right and Allies to the left.


Lumley's ten British squadrons ready to advance.

The left wing of the French, three battalions of infantry, one battery and eight squadrons of Gendarmes waiting to receive them.

The centre of the French line, dismounted dragoons occupying the village of Austand with three battalions of the veteran Navarre regiment in reserve behind.
Grader's Brigade on the French right.


Opposite to them Ferguson's large British Brigade prepares to advance.

Finally the right wing of the Allied infantry ready to support the cavalry attack to their right, Rowe's British Brigade to the front with Wilke's Hessen Kassel Brigade in support.
At 11 o'clock precisely, after an initial artillery bombardment Neal (commanding the Allied force) ordered the advance of the left wing a good dice roll allowing three moves towards the French position.
This picture shows the attack going in on the third turn with the Grader Allemand regiment (in blue coats) having suffered heavy casualties in the firefight forcing the British Battalions back. The small die behind the unit shows it's moral status.

This shows the left hand Greder Allemand Battalion manoeuvring onto the flank of the British battalions which were saved by heavy and accurate British artillery fire into the flank of the French causing them to break. Both Brigades fought themselves to a standstill on this flank, in the end neither being allowed to advance closer to the enemy.

On the Allied right flank their cavalry begin their advance with the Rowe's Brigade in support on their flank. The Hessen Brigade may be seen lagging behind (crappy die rolling Neal!)
Both lots of cavalry were forced to remain in their squadron column formations through lack of room to deploy.
Big mistake Dave, I should have charged but I relied on the firepower (or lack of it!), the British cavalry sliced through their French counterparts after three turns. French to the right British to the left (every one's in red, confusing isn't it!).


My left flank was crumbling before my eyes.


Luck turns. Finally the three Navarre Battalions move into position, the British cavalry fail to get into place to exploit their victory over the Gendarmes and the Wilke's Hessen Kassel Brigade is tardy in it's advance.


All in all a cracking game and one which we will be repeating at the Boarder Riever club in a couple of weeks.
Don't get me wrong, Black Powder isn't perfect, the chance of moving three full moves in one turn at first appears weird (by doing this unsupported by other troops you can get into trouble) I still want to sort out supporting fire on troops charging into contact from this distance, however it can if you wish provide a skeletal set of rules upon which you can fit on bits to replicate the period in which you are fighting and you need to know your period to get this right. What it does do is let the game flow and achieve a fairly realistic result in a sensible time.
Hope you enjoyed the read.
Dave.
Subscribe to:
Posts (Atom)