Love these rules, if David Brown keeps this format for the Napoleonic set he intends to bring out then I and many others from talking to them will be happy people.
As it is I thought I'd put up a turn by turn die roll by die roll walk through of these rules.
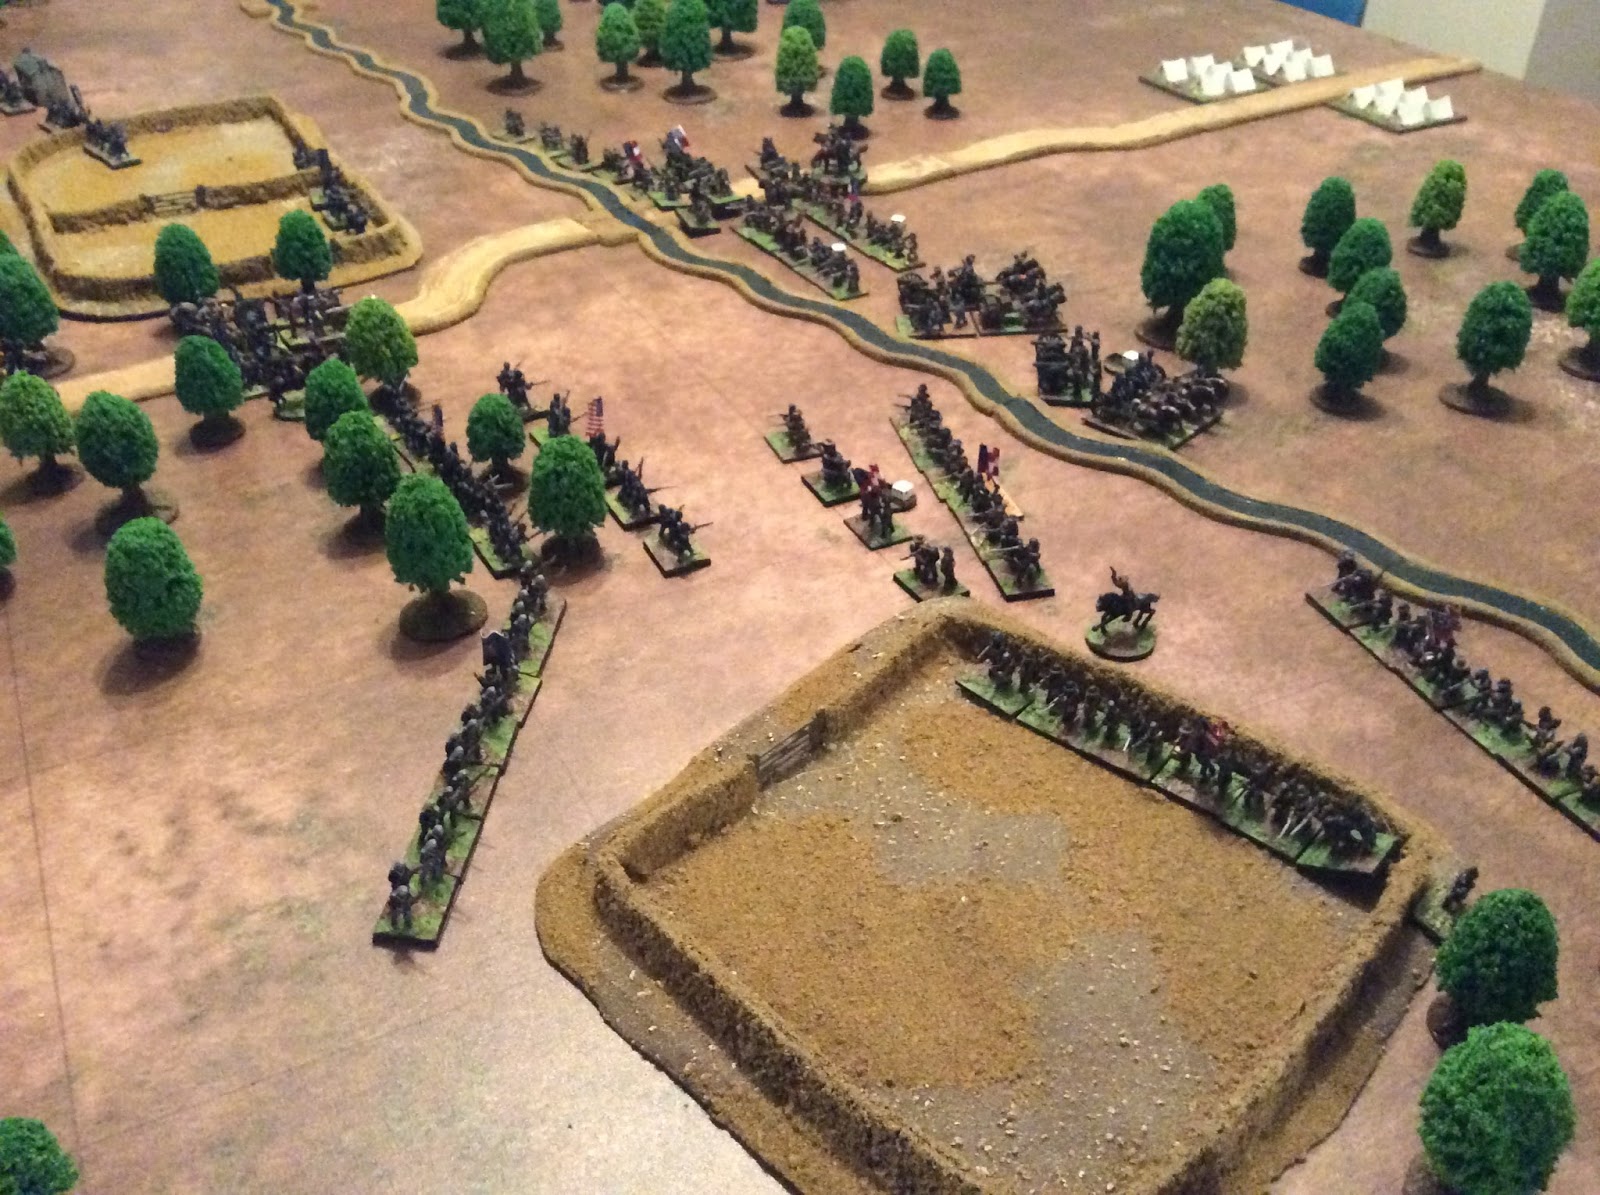
The set up at the beginning of the game, confederate forces attacking, union defending. The Rebs have three brigades (two veteran and one elite) in this division with four regiments in each brigade, each brigade also contains one battery represented by two model guns
The union also have three brigades (one elite and two green) but only two have batteries represented by three model guns in each.


Turn 1:


Command & initiative:
Both players have three brigades and therefore could potentially allocate three staff officers each to allow brigades/troops to do extra things, a chart tells you what the different things are and how many staff officers it will take to make those things happen.
The union player (top) rolls one D6 for each brigade under his command, anything other than a roll of a 1 or 2 means he has staff officers (the white tiddly winks) to allocate. The union commander rolls a 1, 1, and a 4. This means that he can only allocate one staff officer to a brigade of his choice.
The confederate player rolls a 6, 5 and a 2, so can allocate two staff officers to a brigade or brigades of his choice.
As can be seen the reb player has given his two staff officers to a single brigade, in this case the central one as it was felt that speed was of the essence and two staff officers enable 4 + D6 cm can be added to each units basic move.
The union player has allocated his one staff officer to his elite reserve brigade, this will ensure a re-roll if he needs it when he attempts to get this brigade to do something.


In the photos above you can see each union brigades command roll, only 1's or 2's fail.
Top, the reserve brigade which was allocated the only staff officer rolls a 6 - pass, if the roll had been a 1 or 2 then this brigade could have had one re-roll as one staff officer was allocated.
Middle, the brigade rolls a 4- pass.
Bottom, the brigade rolls a 2 - fail, no re-roll as no staff officer was allocated. The brigade is marked Hesitant, no forward movement, no long range fire by artillery or infantry.


In the photos above you can see each reb brigades command roll, only 1's or 2's fail.
Top, the left hand brigade rolls a 3 - pass.
Middle, the central brigade rolls a 3 - pass, but note that even though the confederate commander allocated two staff officers to this brigade to make it move faster it would still have failed if a 1 or 2 had been rolled and would not have been entitled to a re-roll.
Bottom photo, brigade rolls a 2 and is therefore marked hesitant.


Each commander rolls for initiative (who goes first), the union commander (top picture) rolls a huge 12, he has one point taken off for any hesitant brigades under his command so ends with a score of 11.
The confederate commander rolls a very respectable nine, again taking one point off for his hesitant brigade making a total of 8.
The union player has the initiative and goes first in most things this turn, i.e. charges, movement and firing.
Charge phase:
No units are close enough to charge so no charging can take place.
Movement phase;


Top picture, the union player has the initiative and therefore moves first. He decides not to move his right hand brigade, cannot move his left hand brigade forwards as even if he wanted to as it is marked hesitant. He therefore moves his reserve brigade to plug the gap in the centre of his line advancing each unit it's movement distance.
Middle picture, confederate move, the left hand reb brigade advances straight ahead.
Bottom picture, as the confederate commander allocated two staff officers to this brigade it means that he rolls four dice and can add (in this case) 10cm to each units movement rate. Don't forget, if the brigade had failed its command roll it would have been marked hesitant and could not have advanced regardless. It didn't fail so quickly moved up the road, deployed and pushed the regiment in skirmish formation forward.


Fire phase:
The union player won the initiative and therefore goes first.
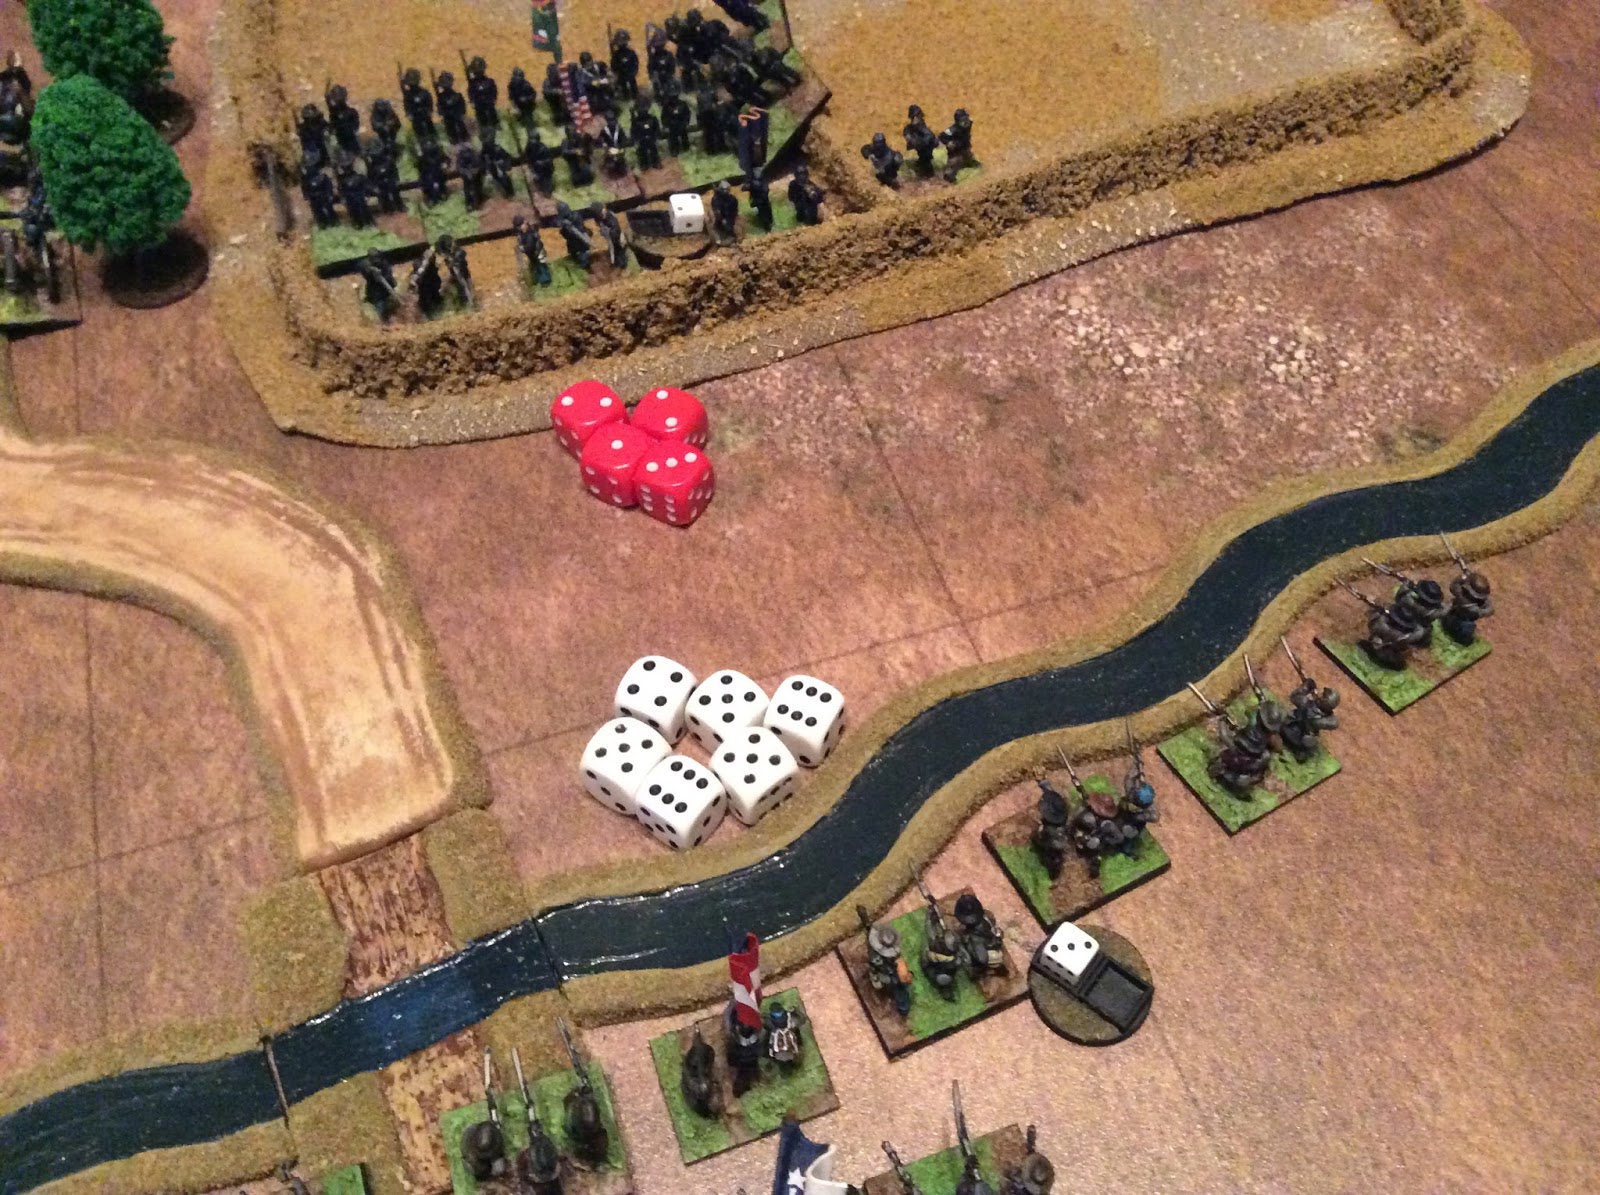
Top picture, at a range of 34cm the union rifled artillery opens fire on the advancing reb skirmishers at effective range, the battery rolls a good 10 and referring to the artillery modifiers, deducts 2 points for firing at skirmishers giving a final total of 8 fire points.

By looking at the artillery fire casualty table (I won't show it as I don't want to run fowl of the copyright laws etc), and cross referencing the 8 fire points with the effective range line it can be seen that 2 casualty points are inflicted on the confederate unit being fired at. This is marked on the unit as can be seen above. As there is no reb unit within 10cm behind the unit being fired at then there is no possibility of a bounce through which could potentially cause casualties to the unit behind. There is no fire from the confederates as no units are in range.

Above, the end of turn one.
I will continue to give examples of the play where they vary with the above but this will be a long enough post if I explained each and every die roll.
Turn 2:


Above pictures, the union commander failed to get any staff officers for turn 2 while the confederate commander can allocate three if he wishes.


Above, all union brigades passed their command rolls so non were hesitant.


Above, the confederate commander allocates two staff officers to the central brigade to increase it's movement for a second turn and one staff officer to the right hand brigade in case it fails it's initial command roll which it did, rolling a 2, but fortunately rolled a 6 straight afterwards. so no hesitant reb brigades either.


Straight die rolls for each side, no deductions as neither side have any hesitant brigades, so as can be seen the union player rolls higher and therefore has the initiative for turn 2.

Having the initiative the union player moves first and continues to move the reserve brigade in march column through the woods. He does not need to roll a unit formation test as the troops are in march column. If they had been in line they would have been required to roll, potentially becoming unformed.

During the reb move both leading units of the right hand brigade move through or cross terrain which requires a formation test when in line. As veteran troops both need 7 or more to remain formed, the unit moving through woods passes, the unit crossing the stream fails and becomes unformed. An unformed unit can still move but will suffer penalties during fire and melee and will have to stand still for one turn to regain its order.


Using the two allocated staff officers the central brigade can move an additional 17cm during it's movement phase. The right hand brigade continues it's advance towards the union positions.

Having the initiative the union player fires first. The artillery battery in the centre opens up again at 34cm (as the skirmishers didn't move). They roll a 7, minus 2 points for firing at skirmishers gives one casualty on the regiment in skirmish order bringing them up to three casualty points, this time though the infantry regiments behind are within 10cm of the unit being hit and therefore have the chance of getting casualties from bounce through. The suffer one casualty on a single die roll per unit within 10cm of a 4, 5, or 6. One of the units behind suffer one casualty (a roll of 4) while the other does not (a roll of 3).
The far right confederate brigade is fired at and suffers one casualty.
Turn 3:


Above pictures, the union speeds the movement of the reserve brigade through the woods in the centre, while the confederate commander allocates one staff officer to two of his brigades to ensure a re-roll if things go wrong.


Lousy dice rolls for the union, all three brigades are hesitant so even the reserve brigade cannot advance and gains nothing from the two staff officers allocated to it.


All three confederate brigades pass though one needs a re-roll.


With no hesitant brigades the confederate commander easily wins the initiative for this turn.


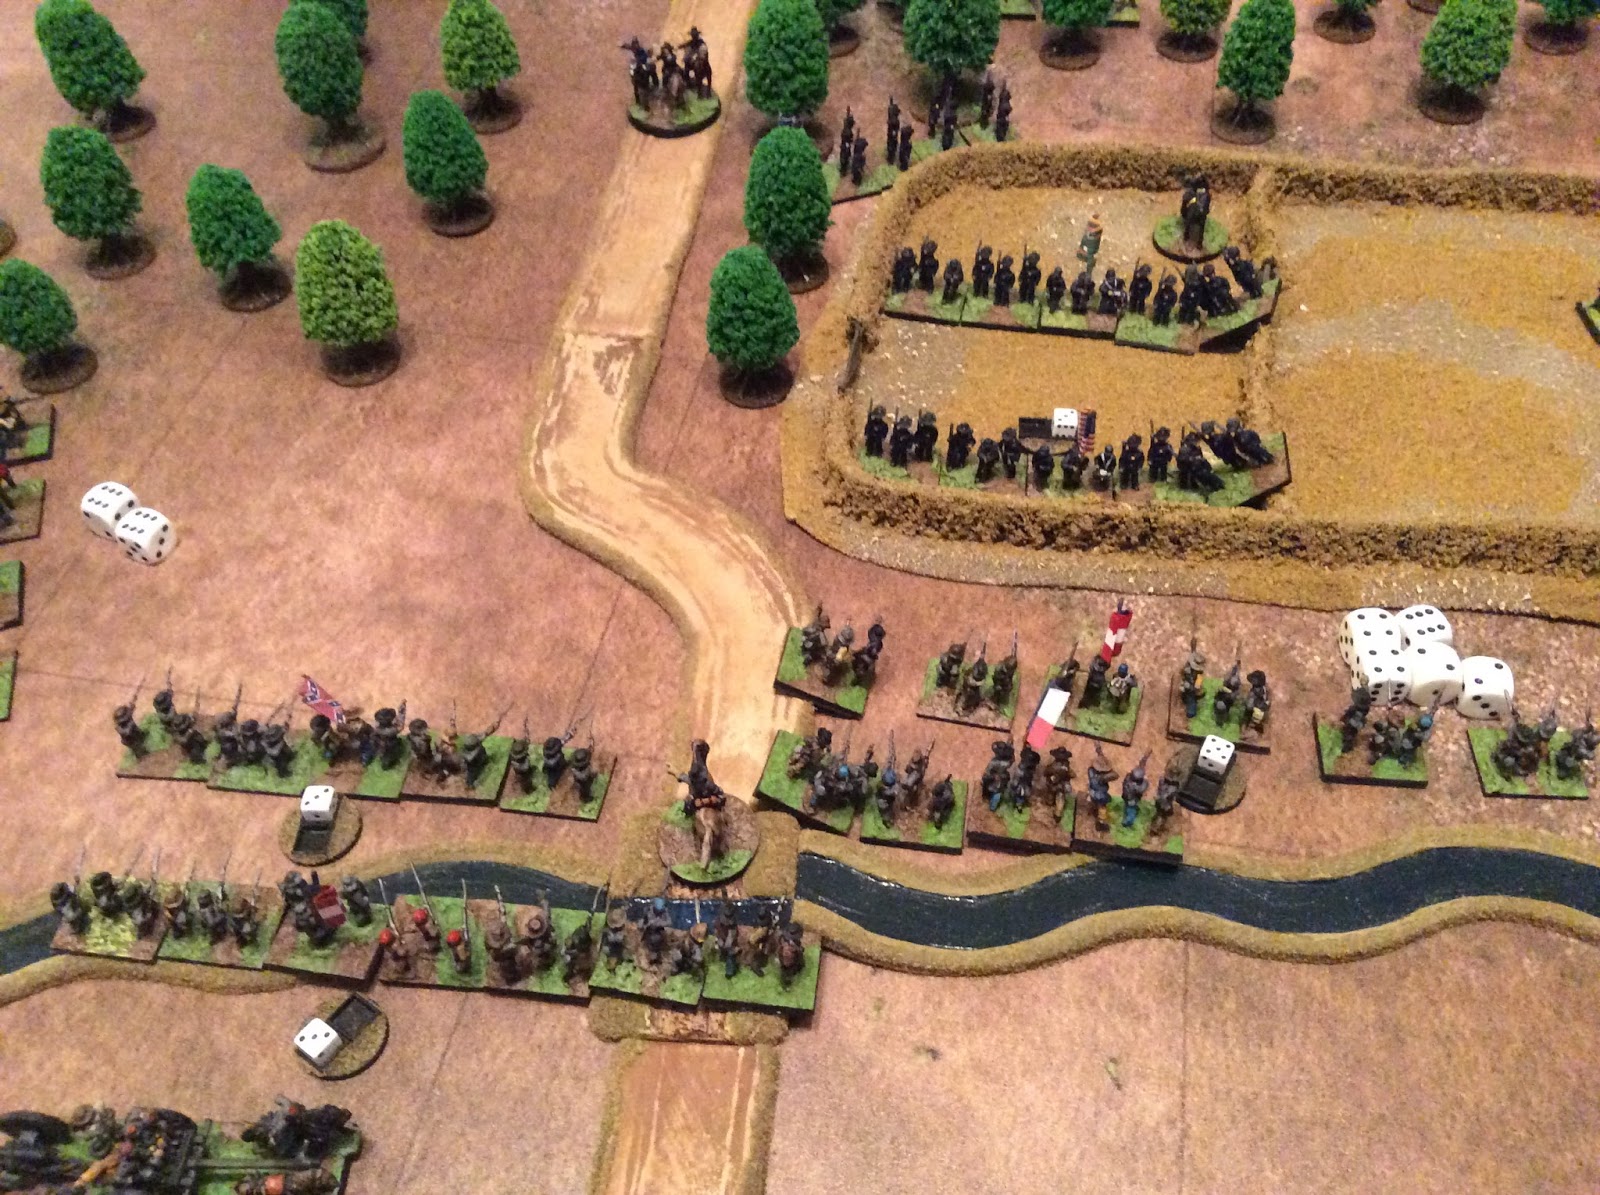
Above pictures, having the initiative the confederate player moves first. The right hand veteran brigade continues advancing over the stream to it's front both units becoming unformed while doing so. In the bottom photo you will see that having remained stationary for this move the left hand regiment has reformed. Truthfully this was slightly pointless as it will have to continue rolling so long as it continues to move over the stream but this was done as an example of reforming. Unless enemy units are close there is no point in reforming while moving through rough terrain, you may as well get through it all first.


Both the other reb brigades continue to advance, note that the regiment in skirmish formation does not have to roll to see if it has become unformed when crossing rough terrain.

Confederate fire, the regiment in skirmish formation open fire on the union battery. They throw one D6 per stand, because of the range they need a 6 to hit and score two casualties. Note that fire by skirmishers is quite a different process than fire by a formed unit.

Again the reb skirmishers open fire on the right hand union regiment, needing sixes they score one casualty.


The top photo shows the union battery in the centre before firing, unfortunately the union player rolls badly and incurs one fatigue casualty point.


The two reb batteries have now deployed, both have moved and are firing at the deployed union battery thereby decreasing their fire point total by four, two for having moved and two for firing at deployed artillery.
The first battery throws a 5, minus 4, and incurs a fatigue point casualty while the second battery throw a double six! this inflicts two casualty points on the union battery and because it was a double six must refer to the serendipaty test chart (this gives a variety of both good and bad outcomes depending upon what dice you roll, i.e. chance!) which on a roll of two removes one casualty point on itself - result.

Further along the line the larger confederate regiment in skirmish formation has no effect on it's union counterparts behind the hedge (they needed 6s to hit).

Union skirmishers return fire and score three casualties.

The union battery, suffering now with five casualties (the higher the number of casualties suffered the more negative the consiquences) causes one casualty on the lead reb regiment and one bounce through on the rear one.

One casualty on the reb skirmish line.


Some general views of the field at the end of this turn.
Turn 4:


Two reb batteries continue to batter their union counterparts the union battery sustaining two casualties taking it to seven points. They for their part caused one casualty with a bounce through on the supporting confederate regiment to it's front.
6's only I'm afraid, if it had been 5's or 6's then this would have been a hell of a result! As you can see the reserve union brigade is finally starting to make an appearance in the centre of their line.

Long range fire continues to pepper the confederates on the right hand side.
Turn 5:


The union regimentguarding the far right of the line opens up on the rebs advancing towards it causing three casualties, two extra die hitting on a 4, 5, or 6 as it is a large unit.

Two hits by the union skirmishers, none for the rebs. They are beginning to suffer.


The first decisive moment in the battle, the two confederate batteries inflict three casualties on their union counterpart causing the union battery to exceed it's sated dispersal point total of 8. The battery disperses and the brigade is immediately given a falter marker.

The confederates in the centre advance over the stream suffering a couple of casualties in the process.

On the far flank the elite confederate brigade approaches the ford, skirmishers taking one casualty from the union battery and one each on the two supporting regiments due to bounce through.
Turn 6:


Significant developments, as this union brigade is marked as faltering it must be allocated a staff officer to hold it together, it then rolled a two and was marked as hesitant, a faltering brigade failing it's brigade order must then test on the Faltering brigade table, this can give a range of results depending on the quality of the brigades troops and the die roll.


As can be seen from the top picture it rolled a 2 pretty crap and was deemed 'Catawumpiously Chewed Up' moved 30cm to the rear with all units receiving 2 casualties and loosing a staff officer from the union pool!


Four photos showing the situation during turn 6, basically the rebs advancing everywhere.

Finally the confederate Elite brigade on the rebs right flank crosses the stream and is getting into action.

In the centre the union reserve brigade is trying to plug the gap left by the dispersed union battery but suffering casualties on the way. Note that even though the confederate skirmishers rolled a double six which would usually require a 'Serendipity Test' (i.e. random event), this only applies to formed units but of course caused the two casualties on the union regiment.

A view of the field at the end of turn 6.
Turn 7:


Neal came along tonight and for one turn only took command of the confederate force. Of course as per normal his dice rolling was excellent and mine as the union commander was crap. Nothing new there then!
Charges are declared and fully completed before movement.
Having won the initiative the two confederate regiments on their left flank announced a charge against the now rallied union brigade in front of them. The union regiment in skirmish formation was the target and after rolling four extra dice for the additional movement given because of the allocation of two staff officers to the brigade easily took the ground they were holding as the skirmishers evaded 30cm to their rear.
N.B. We discovered after the photograph was taken that a charge move should only have had two additional movement dice added, not four. The four dice are added for general movement if two staff officers are allocated to the brigade (the rebs would have got there anyway).

The second confederate charge took place in the centre. The regiment charging the hedge is the primary unit while the regiment on their left is designated as support, both move during the charge but modifiers are applied to the primary unit only, any units supporting a charge allow the player to re-roll one melee die per supporting unit if they so wish. Skirmishers cannot support formed troops but formed troops can support skirmishers.

Neal threw a 6 and a 4 and decided not to re-roll either of his dice while my elite unit threw an abysmal total of 5, bugger.

They promptly retired 'whipped' 30cm unforming the regiment behind within 10cm but not the column which the could swerve past. End of the charge section.

The union move, coming through the woods.


Confederate move, forming a firing line, top picture. forming into line from column. This union regiment cannot advance as it's brigade is 'hesitant'.

Not much fire from the union side as most of their units had participated in a charge. The rebs however inflicted decent casualties on the rebs with the unit which had not moved but suffered a 'fire disruption' on the unit which had advanced to extend their line.
This was something Neal pointed out which I hadn't been doing. I thought that such a result meant that the firing unit had a casualty point inflicted upon it. He said this only applied to artillery as a 'fatigue casualty' and that the infantry got a marker suggesting that they had lost cohesion during firing. This gives negatives during subsequent firing and melee and can only be removed by remaining stationary. No markers for this so I will have to make something for later games.
Turn 8:

The union player won the initiative and announced a charge on the right wing to try to drive the rebs back. His designated lead unit is the one on the left and has it's normal move plus one D6 (3cm in this instance). It uses the 3cm to wheel and then charge to within 5cm of the enemy with any supporting units keeping pace.

The confederate regiment (and any supports to the flanks) may now fire at the charging regiment. They throw a seven but with minuses for casualties lack of fire discipline (shown now by a figure carrying ammo) and being unformed the do bog all! Even the two separate extra casualty dice for being a large regiment (seven stands or more) don't achieve anything as they needed 4, 5 or 6.

Next is the melee stage, note that the whole charge process is completed to it's conclusion before moving onto the next charge elsewhere.
Both sides roll ( note that both sides could have re-rolled one of their dice because each had supports but decided not to) and being fairly close the end result is that the union charge halts where it is and they stand unformed in front of the rebs giving fire. I do like this rule, hand to hand combat is rare and only happens when the final adjusted die rolls are equal. Usually one or the other side gives way or as in this instance doesn't wish to close and stands off firing instead.

I had to re do this picture as I got the procedure completely wrong so forgive the units on the flank appearing from nowhere!
Because of the Halt & Volley result to the union regiment when it atempted to charge in both union regiments now throw a number of casualty dice according to the size of their unit needing 4, 5 or 6 to hit. There are no modifiers to this roll so it can be pretty devastating.
As can be seen five casualties were inflicted on the reb regiment taking it up to eleven, one more casualty will take it to twelve and it will disperse.


Top picture, the union elite regiment declared a charge but didn't need to move as it was already within the 5cm required.
The small reb unit fired causing two casualties.
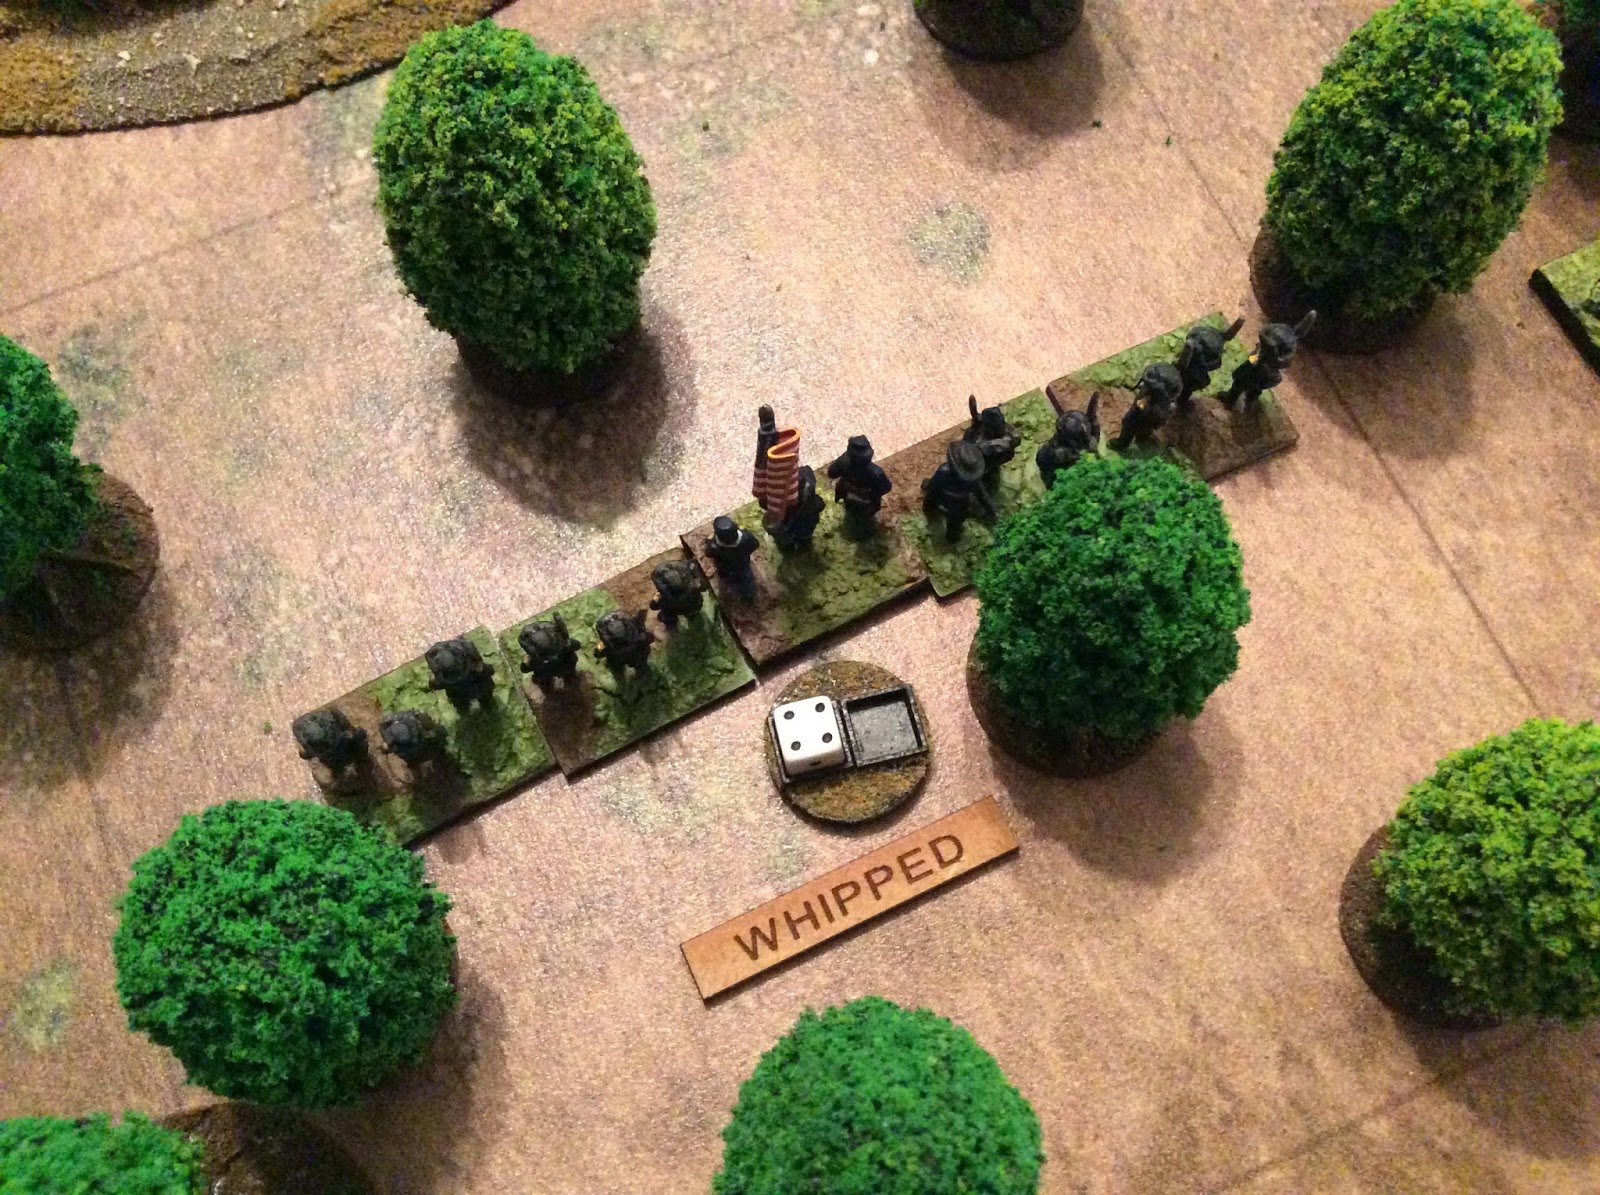
Centre picture, both sides roll for melee, again pretty close with the rebs not taking up their re-roll option because of flank support. Even given the fact that the union regiment was elite, suffering two casualties during the charge and the fact that it was unformed causes it to retire 18cm (bottom photo).

There was some firing on the far right of the confederate line as they pressed forward toward the town but the above picture shows the situation at the end of the turn.
Turn 9:

I have not gone over the charge details again as I have covered it before but as you can see the union brigade has now retired 30cm with the skirmishers routed and the left hand unit 'whipped'. The whole brigade is marked as Faltered which will require another die roll at the beginning of the following turn to see if it regains it's organisation or bugs out!


I included pictures of this charge during turn 9 as it shows the confederate unit charging through woods which reduced it's charge move so much that it only just got to within 5cm of it's union target. This is still enough to allow the charge to continue but the reb regiment conducts it's melee as unformed. Basically I think the idea is that the charge has just enough momentum, but the unit goes in a bit 'raggy' if you know what I mean.

On the left flank the union battery finally succumbs to fire from the reb skirmishers, reaches it's dispersal point total of 8+ and is taken off the table. This automatically gives the brigade a falter mark which requires an immediate roll on the faltering brigade table. Fortunately it passes this and continues normally.
Turn 10:

The end is nigh, beginning of turn 10 and the roll on the faltering brigade table is taken for the right hand union brigade, as can be seen a one ain't good enough and the brigade retires 30cm back, incurs 2 casualties on each unit, loses another staff officer and as if that weren't enough any routing units disperse! Goodnight Vienna, or Washington in this case. It is at the edge of the table so all units are gone.

A large hole for the confederate general to exploit.

A final picture of the field at the end of game turn 10.
Good stuff. As I said at the start I love these rules, they feel right and play smoothly and are pretty fast. This was only my third run through but even though I did get a couple of things wrong it went pretty well.
My apologies to anyone who thought this was an overly long post but I did want to provide a thorough run through of the game die roll by die roll to show how the mechanics of the game work.
If you like the civil war then get these rules, I now can't wait for David's Napoleonic set to come out in the spring 2017.
This particular post took ages to put together so I'm off for a rest!
I hope you all have a good Christmas and have a happy and peaceful new year.
Dave.